Getting Started
Learn how to integrate the Grid Placement System into your Unreal Engine project.
Prerequisites
- Unreal Engine 5.4 or later
- Basic knowledge of Blueprints or C++
- Understanding of Unreal Engine's component system
Installation
- Install the Grid Placement System plugin from fab.com
- Enable the plugin in Edit > Plugins, then restart the editor.

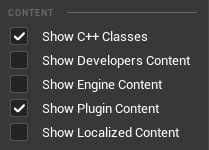
- If the plugin does not appear in your Content Browser:
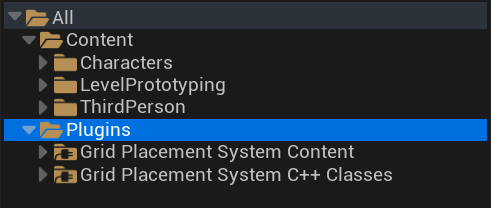
Open your Content Browser settings and enable Show Plugin Content:
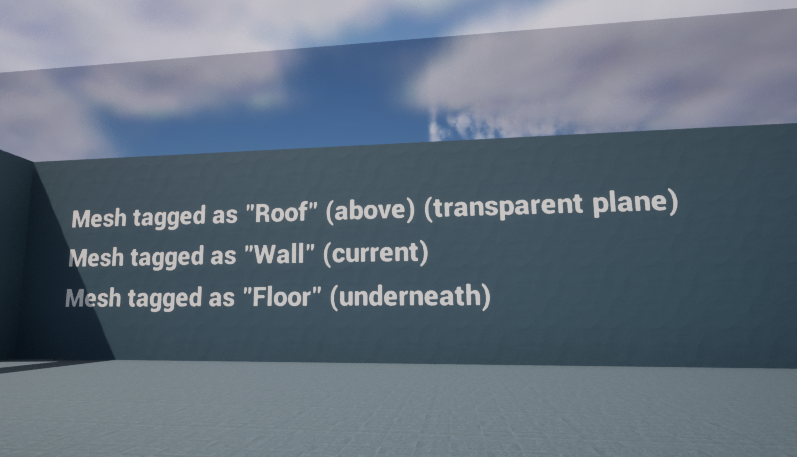
The system uses these tags to identify placement surfaces. give tags "Floor", "Wall", "Roof" in your mesh
Blueprint Setup
These instructions assume a fresh setup.
You may reuse or duplicate relevant actors or variables from the plugin content.
An initialization setup is already available in the Content Browser at:
/GPS_Core/Demo/Character/UEM_CharacterSetup blueprint.
This blueprint is identical to the preview shown below. For a quick setup, simply copy the nodes from UEM_CharacterSetup into your own character.
Inside UEM_CharacterSetup Blueprint
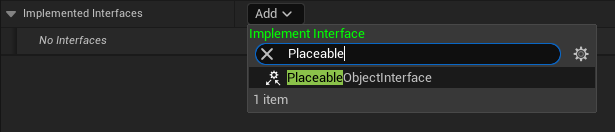
1. Implement the Interface in Your Placeable Objects Actor
Every placeable object must implement the PlaceableObjectInterface:
Configure the required interface functions:
Get Placement Class (Self is the object itself)
Get Class Placement Type (PlacementType variable: Floor, Wall, or Roof).
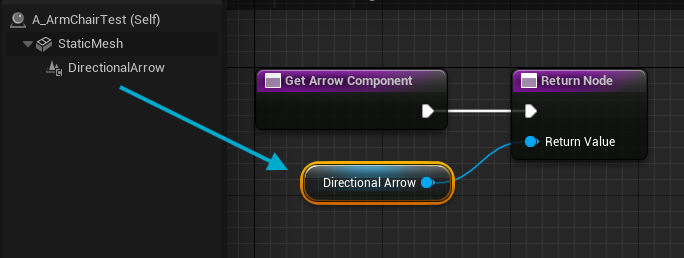
2. (Optional) Add Directional Arrow Component (For Oriented Objects)
For objects that need directional placement (chairs, table and etc):

Reference the DirectionalArrow in the remaining interface class:
3. Add Components to Your Player Pawn
- Open your Character Blueprint.
- Add PlacementSystemComponent and PlacementObjectRegistry components.

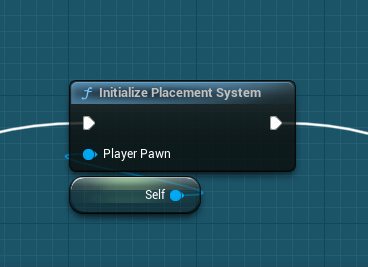
4. Initialize the System (Same as in UEM_CharacterSetup above)
- Call InitializePlacementSystem from PlacementHelper in BeginPlay.
5. Register Placeable Objects
- Placeable objects can be registered in two ways:
- By calling RegisterObject (via PlacementHelper), as shown below
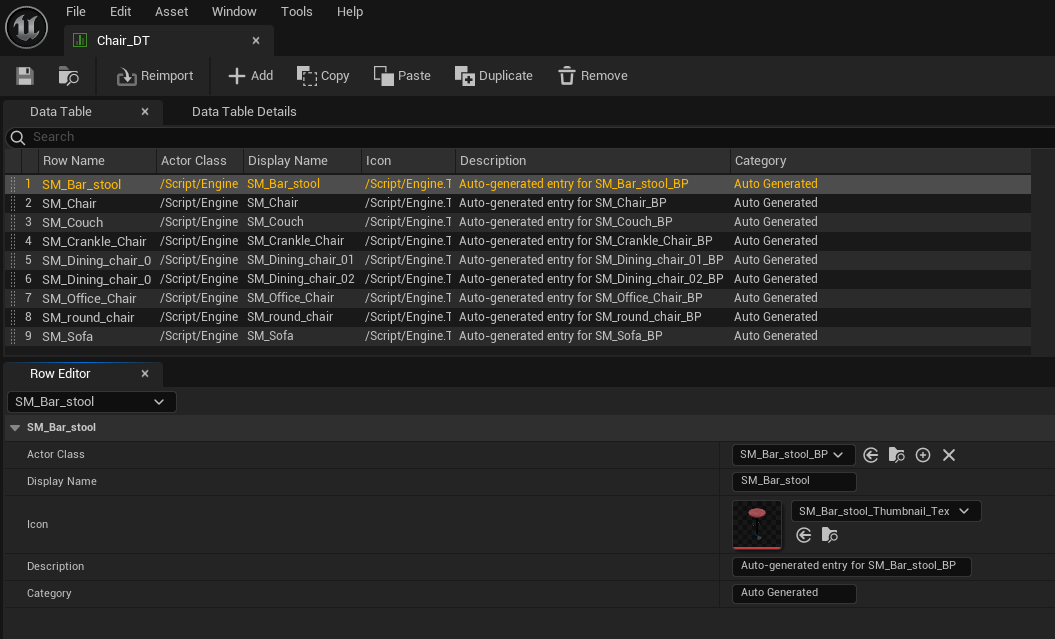
- And, By using a DataTable that follows the PlaceableObjectDataTable structure and linking it to the PlacementObjectRegistry component.

6. Create the UI
- Add the provided (Default) WBP_PlacementObjectsListWidget to your HUD or Character and configure.
- If you want to create your own UI, you can create something like this:
Instantiate WBP_MinimalObjectList for each entry in RegisteredObjects and add it to the WBP_MinimalMenu ScrollBox.
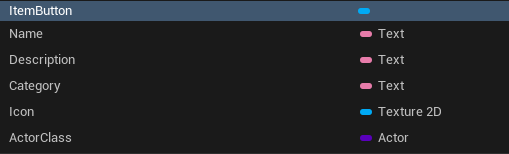
This are WBP_MinimalObjectList hierarchy and variable look like
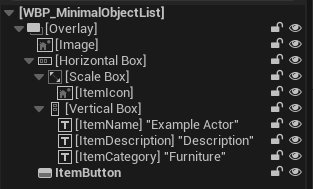
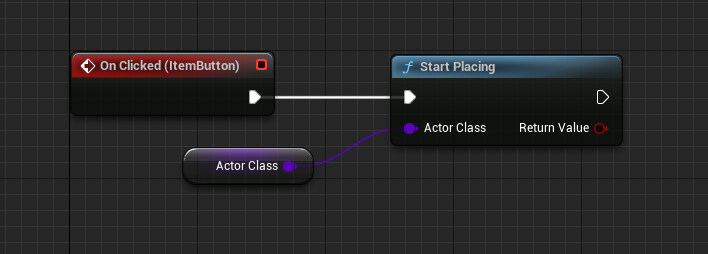
Add OnClick event on ItemButton (in WBP_MinimalObjectList) to call Start Placing from (PlacementHelper)
7. Begin Play
Yeah, play
Input Controls
Once in placement mode, the system provides these controls:
Camera Controls
| Input | Action |
|---|---|
| AWSD | Camera Movement |
| Scroll Wheel | Zoom In/Out |
| L/R Mouse Drag | Camera Panning |
| E and Q | Up/Down Movement |
Object Placement
| Input | Action |
|---|---|
| Left Click | Place Object |
| Right Click | Rotate Object |
| X/ESC | Cancel Placing/Editing Object |
| DEL | Delete Object While Selected |
| Middle Mouse | Select Object for Editing |
Special Modes
| Input | Action |
|---|---|
| Hold Shift | Precision Mode |
| TAB | Toggle Enter/Exit Placement |
| ALT | Toggle Cursor |
Common Issues and Solutions
"Directional arrows not showing"
- Cause: Missing
UDirectionalArrowComponentor not returned inGetArrowComponent - Solution: Add arrow component and return it in interface function
"Objects can't be placed on surfaces"
- Cause: Surfaces missing required tags ("Floor", "Wall", "Roof")
- Solution: Add proper tags to placement surface actors (Default tags are "Floor" if not specified)
"Placement system not responding"
- Cause: Components not added to player pawn or system not initialized
- Solution: Add both required components and call
InitializePlacementSystem
Important Notes
- Interface Implementation: MANDATORY for all placeable objects - without this, objects will not work
- Directional Arrows: Highly recommended for objects with orientation (chairs, and other Floor object)
- Surface Tags: Ensure your floor/wall/roof actors have correct tags ("Floor", "Wall", "Roof")
- Component Dependencies: Both PlacementSystemComponent and PlacementObjectRegistry are required
- Camera Compatibility: System automatically adapts to camera setup by create Spring Arm Component at Runtime. Third Person, First Person are all supported
- Initialization Order: Always initialize the system before registering objects
- Asset Loading: The system loads required materials and input actions automatically from the plugin content
- Grid Display: Grids appear automatically when you enter placement mode
- Collision: Objects validate placement against other objects and world geometry
- Placement Types: Objects can only be placed on surfaces matching their defined placement type